
 Resources & Catalogs
Mounting furniture directly to your wall carries physical risks and permanent consequences. Drilling into wall studs or concrete walls means getting the height wrong results in visible damage and poor viewing ergonomics. As modern interior designs gain massive popularity across expanding markets in Africa, the Middle East, and Southeast Asia, buyers often purchase a floating console based purely on aesthetics. They fail to calculate the intersection of seating height, television dimensions, and structural wall constraints. This oversight frequently leads to neck strain or hardware failure. You need a mathematical and structural framework for determining the exact mounting height. Factoring in room type, hardware specifications, and ergonomic baselines ensures a safe and comfortable setup. We will break down the exact measurements required for different room layouts. You will learn how to align your screen with your seating position while maintaining proper clearance for baseboards and electronics. Proper planning prevents costly wall repairs and guarantees your equipment remains securely anchored.
The Ergonomic Standard: The center of the television should sit approximately 42 inches (106.7 cm) from the floor for standard living room seating, dictating where the floating console must be positioned beneath it.
Standard Floor Clearance: A practical floating TV stand requires 8 to 12 inches (20 to 30 cm) of floor clearance to accommodate baseboards, robot vacuums, and visual balance.
The Bedroom Exception: Bedroom installations require a higher mounting baseline (36–40 inches to the bottom of the unit) to accommodate a reclined viewing angle.
Structural Prerequisites: Final height placement is ultimately governed by wall material, stud or pillar location, outlet positioning, and the weight capacity of the chosen mounting hardware.
Visualizing the setup from the viewer's perspective prevents architectural misalignment. Neck strain occurs when your viewing angle exceeds 15 degrees above or below eye level. You must prioritize human ergonomics over the architectural lines of the room. Establishing a comfortable baseline guarantees long-term viewing comfort. Many people make the mistake of centering their screen on the wall itself. This ignores the actual seating position and forces viewers to look upward, causing physical discomfort over time.
Industry standard dictates the 42-inch rule for standard living room seating. Whether you are furnishing a compact high-rise apartment in Southeast Asia or a spacious majlis and villa in the Middle East, average sofa seat height typically measures 18 inches (45.7 cm). Average adult torso height adds 24 inches (61 cm). Combined, they equal a 42-inch (106.7 cm) eye level. Measure from the floor to the center of your screen to establish this primary anchor point. This central measurement dictates all subsequent furniture placement. You build the entire wall layout around this single coordinate.
Total television height divided by two, subtracted from the 42-inch eye level, determines the bottom edge of the screen. Larger screens push this bottom edge closer to the console. You must calculate precise gaps for 75-inch to 100-inch displays. A massive screen requires the furniture below it to sit lower on the wall to maintain the correct ergonomic center. If you upgrade your television size later, you might need to adjust your furniture height to compensate for the larger physical footprint.
Let us look at the math for common television sizes. A 65-inch television is roughly 32 inches tall. Half of that is 16 inches. Subtract 16 from 42, and the bottom of your screen sits at 26 inches off the floor. If you want a 6-inch gap between the screen and your furniture, the top of your console must sit at 20 inches off the floor. This calculation works for any screen size and ensures you never mount your equipment too high.
Television Size (Diagonal) | Approximate Vertical Height | Distance from Floor to Bottom of Screen (42" Center) | Recommended Console Top Height (Assuming 6" Gap) |
|---|---|---|---|
55 inches | 27 inches | 28.5 inches | 22.5 inches |
65 inches | 32 inches | 26.0 inches | 20.0 inches |
75 inches | 37 inches | 23.5 inches | 17.5 inches |
85 inches | 42 inches | 21.0 inches | 15.0 inches |
You must also account for the specific mounting bracket you choose. Fixed mounts keep the screen flush against the wall, making calculations straightforward. Tilt mounts push the top of the screen outward, which slightly alters the viewing angle. Full-motion articulating mounts extend the screen into the room. When you pull a screen forward, the perceived viewing angle changes. You might need to mount the screen an inch or two lower if you plan to keep it extended frequently.
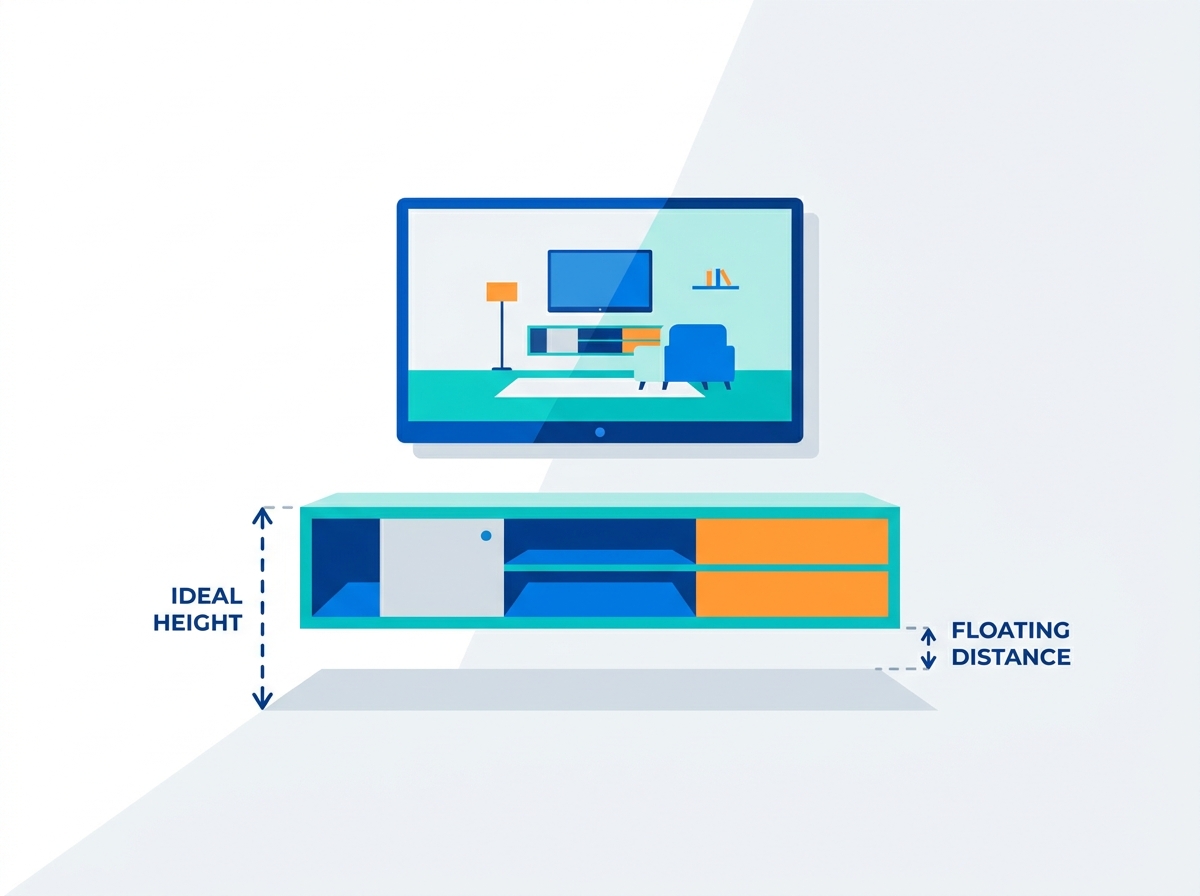
Living rooms demand specific installation metrics. The top of your TV stand should generally sit 20 to 25 inches (50.8 to 63.5 cm) from the floor. Maintain a 4 to 8-inch (10.1 to 20.3 cm) gap between the top of the floating console and the bottom of the display. This space accommodates soundbars and provides necessary decorative clearance. It prevents the setup from looking cluttered. You need enough room to place items on the surface without obstructing the bottom of the screen.
Bedrooms require elevated viewing angles. You must accommodate a supine or reclined viewing position. Raise the television center to 50–55 inches (127 to 139.7 cm). Consequently, mount the floating console 28 to 32 inches (71.1 to 81.3 cm) off the floor. Downward-tilting brackets impact the visual gap above the unit. You must account for the tilt angle when measuring the distance between the screen and the furniture. A tilted screen requires a slightly larger gap to prevent the bottom edge from visually crowding the console surface.
Open-concept spaces and kitchens serve dual purposes, a layout trend rapidly expanding in urban developments across Southeast Asia and Africa. Viewers transition between standing in the kitchen and sitting in the living area. Compromise by raising the baseline center to 48 inches (121.9 cm). Adjust the console height accordingly to balance both sightlines. This hybrid approach ensures the screen remains visible over kitchen islands while remaining comfortable for seated guests. You have to find the middle ground between a standing eye level of 60 inches and a seated eye level of 42 inches.
Basements and dedicated luxury home theaters, increasingly popular in Middle Eastern estates, often feature tiered seating. If you have a second row of seats on a riser, you must calculate the sightlines from the back row. The front row viewers might have to look slightly upward so the back row viewers can see over their heads. In these specialized rooms, the screen center might push up to 46 or 48 inches. Your furniture must follow suit, maintaining that critical 4 to 8-inch gap below the display.
Measure the exact height of your primary seating.
Sit in the seat and measure the distance from the floor to your eyes.
Mark this eye-level measurement on the wall with a pencil.
Calculate the physical height of your television screen.
Divide the screen height by two to find the center point.
Align the screen's center point with your eye-level mark on the wall.
Measure down from the bottom edge of the screen to determine your furniture gap.
You must establish a reliable formula for installation. Top-of-Unit Height minus Cabinet Vertical Thickness equals Floor Clearance. This three-way calculation prevents mounting errors. Analyze standard cabinet heights carefully. A 14-inch (350 mm) standard cabinet behaves differently than a slim 8-inch (200 mm) low-profile console. You cannot use the same mounting template for both designs. The physical bulk of the furniture dictates how much empty space remains underneath it.
Top of Unit Height | Cabinet Vertical Thickness | Resulting Floor Clearance | Aesthetic Result |
|---|---|---|---|
24 inches | 14 inches | 10 inches | Optimal aesthetic balance |
22 inches | 8 inches | 14 inches | Potential "floating away" risk |
20 inches | 16 inches | 4 inches | Too low, blocks robot vacuums |
26 inches | 12 inches | 14 inches | Exposes wall outlets below |
Analyze the functional requirements of floor clearance. Baseboards typically measure 3 to 5 inches in height. Robot vacuums need a minimum of 4 to 5 inches (10 to 12.7 cm) of accessibility. HVAC vents require unobstructed airflow to regulate room temperature effectively. Ignoring these practical constraints leads to daily frustrations. If you mount the unit too low, your vacuum will get stuck, and your floor vents will blow hot air directly into the bottom of your electronics.
Aesthetic trade-offs matter immensely. Mounting higher than 15 inches (38 cm) creates a disconnected, floating away look. Mounting under 6 inches (15.2 cm) mimics a floor-standing unit and defeats the entire purpose of wall-mounted furniture. Evaluate depth and protrusion constraints. Deeper units exceeding 16 inches (40.6 cm) need slightly higher placement. This prevents knee-strikes in high-traffic areas. A shallow unit can sit lower because it does not intrude into the walking path.
Calculate necessary vertical space for peripheral devices. AV receivers, gaming consoles, and center-channel speakers resting on top require adequate breathing room. Measure your largest piece of equipment and add two inches for heat dissipation. Factor this combined height into the gap between the console and the screen. Modern gaming consoles generate significant heat. Especially in warmer climates across Africa, the Middle East, and Southeast Asia, cramming them into a tight space between the furniture and the screen will cause severe thermal throttling and hardware failure.
Consider the visual weight of the materials. A solid oak cabinet looks heavier than a white gloss minimalist shelf. Heavy, dark materials often look better mounted slightly lower to ground the room visually. Light, thin materials can float higher without looking out of place. You must balance the physical dimensions with the visual impact of the finish.
Mitigate weight capacity risks immediately. A floating unit carrying heavy AV equipment cannot rely on drywall anchors. Standard 16-inch or 24-inch stud spacing might force a lateral shift in placement. Maintain center alignment by using robust mounting rails that span across multiple studs. Never compromise structural integrity for perfect visual centering. If your wooden studs do not align with your room layout, you must install a plywood backer board behind the drywall to create a solid mounting surface.
Address the hidden cord requirement during the planning phase. Console height must align with existing or planned recessed power outlets. This avoids visible dangling wires. Evaluate in-wall cable routing kits versus surface-mounted raceways. Routing cables behind the drywall provides a professional finish but requires avoiding internal fire blocks. You must cut access holes and fish the low-voltage cables through the wall cavity. Never run high-voltage power cords inside the wall unless they are specifically rated for in-wall use.
Differentiate installation realities based on regional wall materials. While homes in some regions use wooden studs, residential construction across Africa, the Middle East, and Southeast Asia heavily utilizes solid concrete, hollow block, or brick walls. Metal studs require toggle bolts and enforce significantly lower weight limits. Masonry or brick walls require heavy-duty masonry anchors and hammer drills. You can learn more about our structural manufacturing standards on our about us page. Always match your hardware to your specific wall composition. Using wood screws in a metal stud or a concrete block will result in immediate failure and property damage.
Locate the exact center of your desired installation area.
Use a stud finder or wall scanner to locate wall studs or assess masonry density.
Mark the mounting centers with a pencil.
Measure the distance between the anchoring points to confirm safe spacing.
Hold the mounting bracket against the wall and level it.
Mark the pilot hole locations directly over your structural marks.
Drill pilot holes using the appropriate drill bit (wood or masonry) for your lag bolts.
Secure the bracket to the wall and verify it is perfectly level before hanging the furniture.
Weight distribution plays a critical role in long-term stability. Do not place all your heavy amplifiers and receivers on one side of the cabinet. Distribute the weight evenly across the internal shelves. This prevents the mounting bracket from twisting or pulling away from the wall unevenly. Check the manufacturer specifications for the maximum weight capacity of both the furniture and the mounting hardware. Always calculate the total weight of the cabinet plus all the equipment you plan to put inside it.
Compare minimalist low-profile designs against high-capacity storage options. Thin, single-shelf consoles can be mounted higher without dominating the wall. Thick, multi-drawer units require lower mounting to prevent a top-heavy appearance. Your storage needs directly influence the visual weight of the installation. If you have a massive physical media collection, you need a larger cabinet. This forces you to mount the unit lower to maintain proper floor clearance and visual balance.
Evaluate acoustic interference carefully. Console height impacts audio performance significantly. Placing a soundbar too low degrades high-frequency audio delivery. Recessing speakers inside a cabinet muffles the soundstage. Keep audio equipment as close to ear level as possible for optimal clarity. If you place a center channel speaker on top of the cabinet, you must ensure the tweeters point directly at the seating area. You might need to use acoustic isolation pads to angle the speaker upward if the cabinet sits too low.
Lighting integration changes how you perceive the height. Adding LED bias lighting behind the screen or under the floating cabinet creates a halo effect. This lighting draws attention to the gaps you calculated. If your floor clearance is uneven because your floor is not level, under-cabinet lighting will highlight that flaw immediately. Always measure from the floor in multiple spots to ensure your floor is actually level before you drill your mounting holes.
Consider the impact of room traffic. In larger multigenerational households common throughout Africa and the Middle East, a cabinet mounted near a doorway or hallway must not obstruct the walking path. If the corner of the furniture protrudes into a high-traffic area, you risk physical injury. You might need to choose a unit with rounded corners or a shallower depth. Functional placement always overrides pure aesthetic design when family safety is involved.
The ideal height remains a mathematical equation starting from the viewer's eye level. It is never an arbitrary measurement from the floor. Finalize your television size and measure your seating height before purchasing a console. This ensures the unit dimensions fit the required wall space perfectly, adapting securely to the architectural standards of your region.
Use painter's tape to mock up the television and console dimensions directly on your wall.
Locate and mark your wall studs or concrete anchor points using reliable tools.
Verify outlet placement and cable routing paths before drilling any pilot holes.
Calculate the exact weight of your equipment to confirm mounting hardware capacity.
A: We recommend 8 to 12 inches of floor clearance. This provides optimal aesthetic balance while ensuring practical space for robot vacuums, baseboards, and floor vents.
A: Maintain a 4 to 8-inch gap between the top of the console and the bottom of the television. This ensures enough space for a soundbar without disconnecting the display visually from the furniture.
A: We strictly advise against mounting on bare drywall. The combined weight of the MDF or wood console and AV equipment requires structural support. You must mandate stud mounting or use proper concrete and masonry anchors commonly used in robust brick or block walls.
A: Yes, exposing the floor space underneath the console creates a visual trick. This continuous sightline of flooring increases the perceived square footage and openness of a room. Additionally, in humid or tropical climates like Southeast Asia, elevated furniture protects against floor moisture and simplifies thorough cleaning.
A: You can install in-wall power kits to route cables behind the drywall. Alternatively, strategically place the console directly over existing low-wall outlets to mask the connections completely.


