
 Resources & Catalogs
Open-concept floor plans, floor-to-ceiling windows, and prominent architectural features frequently eliminate traditional, unbroken wall space for media setups. Particularly in the rapidly developing real estate markets across Southeast Asia, the Middle East, and Africa, homeowners and designers face a growing spatial conflict when trying to integrate large displays into modern condos, luxury villas, and contemporary homes. Forcing a wall mount in compromised areas leads to severe ergonomic issues, structural risks, or heavy screen glare. Mounting a screen over a high fireplace forces an unnatural viewing angle that causes neck strain, while attempting to secure heavy brackets without proper studs invites catastrophic drywall failure and equipment damage.
Resolving this requires shifting away from default wall-mounting and evaluating freestanding infrastructure. This guide breaks down technical placement strategies, ergonomic standards, and how to select the right TV stand or alternative mounting hardware based on room constraints. You will learn how to navigate traffic flow, manage cables safely, and maintain a comfortable viewing height without relying on empty walls. For more background on our methodology, you can read about us and our approach to spatial design.
Freestanding infrastructure is the baseline: A properly specified TV stand with a finished back or integrated VESA mount offers the highest flexibility with the lowest structural risk.
Ergonomics dictate placement: Adhering to the Generally Accepted TV Placement Procedures (GATPP) ensures the center of the screen remains at seated eye level (typically 42 inches from the floor), ruling out most high-angle placements.
Window placement requires strategic orientation: Placing a screen in front of a window is viable if utilizing a low-profile console and managing directional light (especially crucial for mitigating intense sun exposure in regions like the Middle East and Africa).
Cable management defines success: Floating a TV in an open room requires specialized cord routing solutions, such as floor channels or hollow-column floor stands, to maintain safety and aesthetics.
Before moving any furniture or buying equipment, you must evaluate the physical limitations of the space. Whether you are furnishing a high-rise apartment in Southeast Asia or a spacious open-plan home in Africa, a successful layout balances traffic flow, natural light, and structural reality. Ignoring these factors leads to cramped walkways, unwatchable screens, and potential safety hazards. You need a tape measure, a stud finder, and a clear understanding of how people move through the room.
Define the primary and secondary walkways in your living area. A successful placement must maintain a minimum of 36 inches of clearance around the media setup. This spacing prevents tipping hazards and stops the room from feeling like a bottleneck. If a freestanding unit blocks a natural path from the kitchen to the seating area, you need to reconsider the orientation. Mark the floor with painter's tape to visualize the footprint of the furniture and the required walking space. Test the flow by walking through the taped-off areas during different times of the day.
Window orientation heavily influences screen visibility. In sun-drenched regions such as the Middle East and Africa, managing natural light is a critical design step. South-facing windows can reduce direct screen glare when the display is positioned in front of them, as the light path is parallel or overhead. North-facing windows provide consistent, indirect light that rarely washes out a display. East and west windows create harsh, direct glare at specific times of day, requiring careful planning and mitigation strategies.
Establish criteria for blackout treatments if placing the screen opposite a west-facing window.
Consider relying on screen brightness (measured in nits) and anti-reflective panel coatings for rooms with unavoidable ambient light.
Test the glare at different times of day before committing to a final position.
Evaluate the impact of interior lighting, such as recessed ceiling cans or floor lamps, on the screen surface.
Attempting to mount on non-load-bearing surfaces, plaster, metal studs, or the hollow-block and concrete walls prevalent in Southeast Asian and African construction without proper anchoring systems carries significant risk. The "no-stud" or masonry drilling dilemma often forces homeowners into complex workarounds. While specialized anchoring systems exist, they cannot match the absolute physical security of a floor-supported unit. Floor-supported options present a safer, more compliant alternative, completely bypassing the need to drill into questionable walls.
Mounting Surface | Structural Risk Level | Recommended Hardware | Viability for Heavy Displays |
|---|---|---|---|
Standard Wood Studs (16" on center) | Low | Lag bolts into center of stud | High |
Metal Studs / Hollow Block | High | Toggle bolts, heavy-duty masonry anchors | Low to Medium (requires reinforcement) |
Lath and Plaster | Very High | Surface mounting plates, deep anchors | Low (high risk of cracking) |
Freestanding Floor Unit | Zero | Anti-tip tethering straps | Maximum |
A freestanding unit is often the most reliable choice for challenging rooms. It requires zero installation, provides inherent cable management, and houses peripheral equipment easily. This contrasts sharply with the permanence and structural demands of wall mounting. Selecting the right configuration depends entirely on the specific geometry of your room and the size of your display.
Corner units are ideal for rooms with intersecting pathways, such as near sliding doors or transitional hallways in compact Southeast Asian urban apartments. Look for trapezoidal or hexagonal rear profiles that allow the unit to sit flush against the corner angle. The main limitation is that the widening geometry restricts maximum screen size. Screens over 65 inches often protrude awkwardly into the room when placed in a corner, exposing the rear chassis and creating a collision hazard.
Measure the depth of the corner from the apex to the desired front edge of the unit.
Calculate the maximum width of the screen to ensure the edges do not hit the adjacent walls.
Verify that the rear profile of the furniture matches the angle of your walls (typically 90 degrees, but older homes may vary).
Check for baseboard heating or floor vents that might be blocked by a solid corner unit.
These stands work best for ultra-modern spaces or secondary viewing areas like bedrooms and offices. When evaluating these options, assess VESA compatibility, weight capacity, and the presence of a tethering system for tip-over compliance. The drawback is zero storage for peripheral devices and highly visible cable routing, unless the stand features hollow legs to hide the wires. You must also account for the wide stance of the tripod legs, which can present a tripping hazard if placed too close to a walkway.
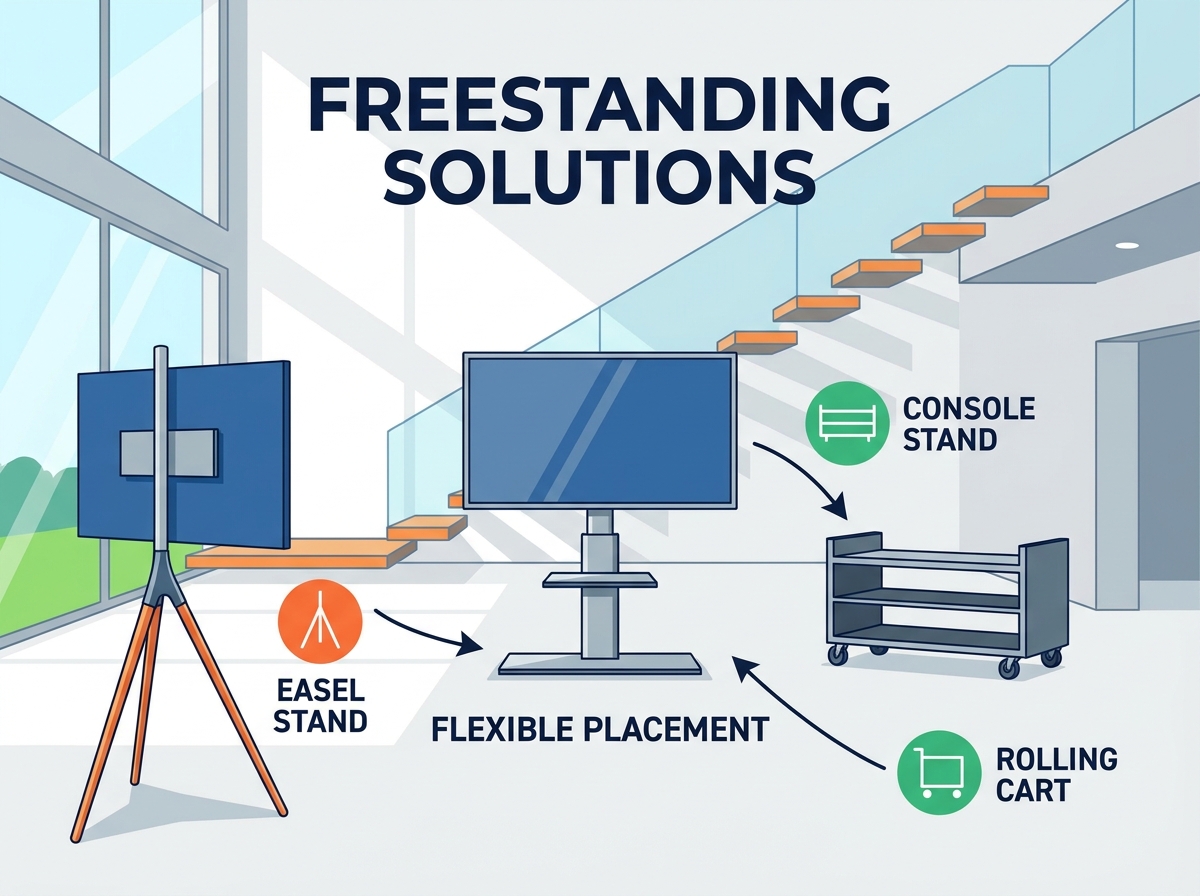
Placing the screen directly in front of a window or sliding door is a viable tactic when wall space is non-existent. The unit must be lower than the window sill to avoid blocking natural light and exterior views, a design strategy often utilized in upscale Middle Eastern and Southeast Asian residential layouts. Using a styled sideboard maintains design continuity. Pair this setup with a screen that has a clean, finished back panel, as the rear of the unit will be visible from the outside. You must also ensure the window is properly sealed to prevent moisture damage to the electronics.
Avoid the "black box" eyesore in open spaces. Proper styling integrates the screen into the room rather than letting it dominate the visual landscape. When a display floats in the middle of a room, the rear profile becomes a prominent design element that requires careful management.
Use asymmetrical decor on a wider unit, balancing the screen with tall tropical indoor plants suited for Southeast Asian climates on one side and low-profile books on the other.
Integrate leaning artwork or a decorative floor mirror offset behind the setup to soften the visual impact of a floating screen.
For screens floating in the middle of a room, place a low console table directly behind the sofa configuration, styled with books or low-light indoor plants to obscure exposed rear ports.
Utilize woven baskets (a beautiful nod to African craftsmanship) or intricately carved decorative boxes on the lower shelves to hide gaming controllers, remotes, and power bricks.
Apply a fabric wrap featuring rich textures suitable for Middle Eastern aesthetics or custom acoustic paneling to the back of the display if the plastic chassis is exposed to the dining or kitchen area.
When standard furniture does not fit the architectural layout, advanced hardware and unconventional placement strategies offer alternative paths. These solutions often require more planning, higher budgets, and sometimes professional installation, but they solve complex spatial problems effectively.
Positioning a heavy-duty, finished-back unit or a custom bookcase perpendicular to a wall acts as an effective room divider. This approach defines separate zones in an open-concept space. Risk mitigation requires anchoring the furniture to the floor or a single side wall to prevent lateral tipping. You must use heavy-duty L-brackets and secure them directly into the floor joists or wall studs. Freestanding bookcases used for this purpose must have a wide, stable base and a low center of gravity.
Housing the screen inside a credenza at the foot of a bed or center of a room solves both the aesthetic problem and the spatial problem. The lift raises the screen only when in use. While this involves a high cost, it hides the screen completely when inactive. You must evaluate lift mechanism durability, weight limits, and internal heat dissipation before purchasing. Ensure the cabinet has adequate ventilation to prevent the display and lift motor from overheating during extended use.
Suspending the screen from structural ceiling joists or using a commercial-grade tension pole is strictly for scenarios with zero available floor space. This limitation often violates ergonomic viewing heights and requires complex, in-ceiling cable routing to maintain a clean look. Tension poles must be installed on solid flooring and structural ceilings; drop ceilings or floating floors cannot support the compressive force required to keep the pole stable.
Mounting screens over fireplaces or high on pillars causes physiological strain. Adhering to established ergonomic frameworks prevents neck and eye fatigue. The Generally Accepted TV Placement Procedures (GATPP) provide a mathematical baseline for comfortable viewing, regardless of the hardware used.
The center of the screen should sit approximately 42 inches from the floor for standard sofa heights. This formula ensures the display remains at seated eye level. Limit vertical tilt to under 15 degrees and maintain a horizontal viewing angle within 30 degrees of the viewer's center line. If you must place the display higher than 42 inches, you must incorporate a downward tilt, but this is a compromise that still introduces some level of neck extension.
Optimal viewing distance is generally 1.5 to 2.5 times the diagonal screen size. Calculating this ratio helps users size their equipment appropriately for tight, unconventional spaces. Sitting too close to a massive screen degrades the viewing experience, while sitting too far makes small text illegible.
Screen Size (Diagonal) | Minimum Viewing Distance | Maximum Viewing Distance |
|---|---|---|
42 inches | 5.25 feet | 8.75 feet |
55 inches | 6.8 feet | 11.4 feet |
65 inches | 8.1 feet | 13.5 feet |
75 inches | 9.3 feet | 15.6 feet |
85 inches | 10.6 feet | 17.7 feet |
Routing power and HDMI cables when a unit is placed in the middle of a room presents a significant challenge. This is particularly true in many Middle Eastern and Southeast Asian homes that favor hard marble or tile flooring, making under-rug routing more difficult. Floating setups require deliberate cord management to prevent tripping hazards and maintain a clean aesthetic. Leaving cables exposed across a walkway is a severe safety violation and looks terrible.
Evaluate the use of low-profile floor cord covers (rubber duckbill runover ramps) to protect cables crossing short distances of exposed hard floors.
Routing under area rugs requires strict adherence to fire safety compliance. You must use specifically rated, flat power cables designed to resist crushing and heat buildup.
Utilize baseboard raceways to run cables along the perimeter of the room before crossing to the center at the narrowest point.
Retrofitting floor outlets directly beneath the unit provides a truly seamless, code-compliant floating setup. This requires an electrician to pull wire through the crawlspace or subfloor.
Bundle all cables running from the display to the peripheral devices using braided sleeving or hook-and-loop ties to create a single, clean umbilical cord.
Different solutions offer varying levels of value based on your budget and need for flexibility. Standard units provide the lowest cost and highest flexibility, making them ideal for renters or frequently changing layouts. You can move them easily, and they require no structural modifications to the home. Easel mounts offer moderate cost and high aesthetic value but lack peripheral storage, forcing you to find alternative locations for streaming boxes and soundbars. Motorized lifts and custom carpentry represent the highest cost and zero flexibility once installed. These are suited best for permanent architectural builds where the layout will not change for a decade or more.
When wall space is unavailable, a well-proportioned freestanding unit remains the most structurally sound and ergonomically correct solution. Base your final hardware choice on the room's traffic flow, direct window glare, and cable management capacity.
Measure your available floor footprint carefully, ensuring a 36-inch clearance for all walkways.
Calculate your seated eye level to confirm the center of the screen hits the 42-inch mark.
Verify the VESA compatibility and weight limits of any stand or lift mechanism before finalizing your purchase.
Map out your cable routing path and purchase the necessary floor channels or flat cables.
A: Yes, placing a screen in front of a window is possible. Use a low-profile unit that sits below the sill to preserve natural light. Manage glare by considering the window's orientation and utilizing appropriate window treatments.
A: Hide cables using low-profile floor cord covers or by retrofitting a floor outlet directly beneath the unit. Avoid running power cables under rugs unless using specifically rated, fire-compliant flat cables.
A: The correct height ensures the center of the screen is at seated eye level. For standard sofas, this means the center of the screen should be approximately 42 inches from the floor.
A: Corner units are highly functional for rooms with intersecting pathways. Modern designs offer clean lines and flush fits, making them practical for dead space, though they do restrict maximum screen size.
A: Secure the screen using VESA-compliant tethering straps attached to the back of the furniture. If using the unit as a room divider, anchor the furniture base to the floor or an adjacent wall.


